Working with child themes
Changing style
The easiest way to update the site is to use CSS in your child theme to override the styles applied to your website. You can use CSS just as you would normally do to override and create new styles for your site.
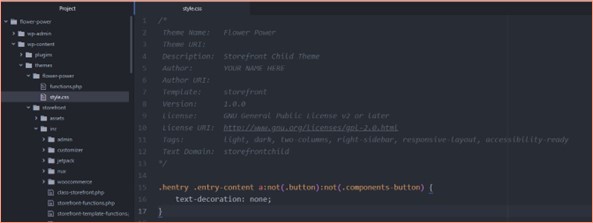
Let’s say we wanted to remove the underline from the buttons on our site. First, we need to find out what selector is styling the button. We can look at our developer tools for this.

In this case it is
.hentry .entry-content a:not(.button):not(.components-button) {
  text-decoration: underline;
}
Now we can go to the stylesheet in our child theme and override this style.
Once added, you’ll see the underline from the button has gone as the child theme’s style overrides the parent’s styles.
You can do this with any style on your site. Find out what selector is styling the element, and override it using your child theme’s stylesheet.
Sometimes it can take a while to search through the HTML and CSS to find how certain elements are styled. It’s a good idea to use your developer tools to test and find the styling you’d like to adjust.
Your child theme stylesheet is not just for overriding styles but can also create new styles.
Functions.php
The functions.php file is used to add unique features to your theme. It works quite similarly to how plugins add functionality to your website.
You can use functions written by WordPress, or you can write your own function. If you look at your site’s parent theme, you’ll find a stack of PHP functions defining functionalities for the site and setting which CSS and JavaScript files to use.
In our child theme, we can add new or override functions set in the parent functions.php file.
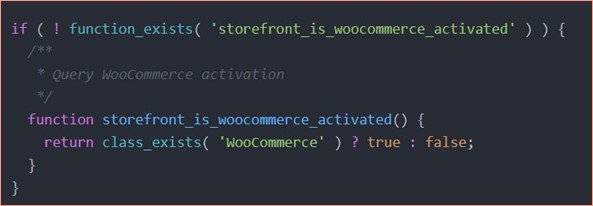
Pluggable functions
A good theme will have a range of pluggable functions that can plug into your child theme and edit.
The way to spot a pluggable function is an ‘if’ statement, which tests whether the function has already been defined in the child theme. If it has already been defined, then the parent theme function doesn’t run that function.
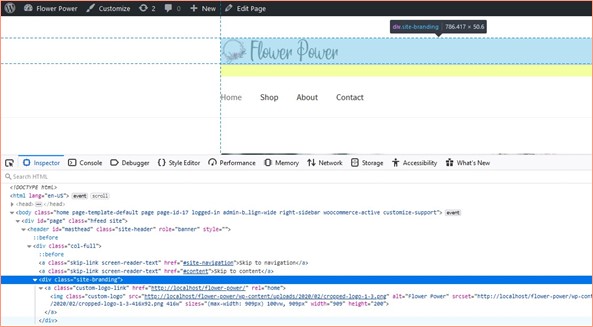
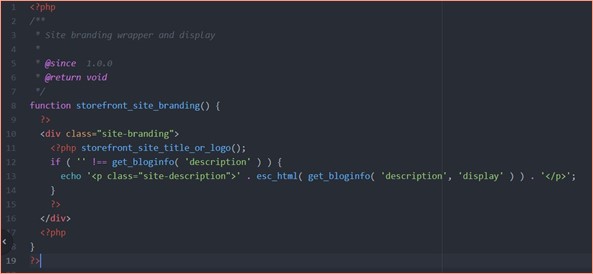
Let’s say we want to update the heading to include our tagline underneath our logo. The first thing we should do is find out what element contains our logo, and to do this, we can inspect the element. It is a div with class “site-branding”.
Next, we can search through our WordPress files for a mention of <div class="site-branding">.
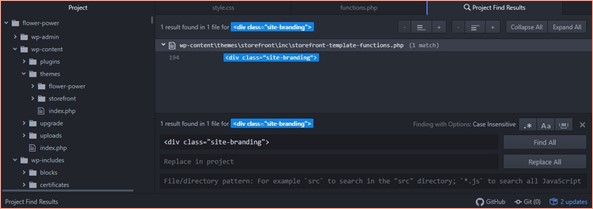
Once you have found the PHP file that controls what is displayed in that section, go to the file called storefront-template-functions.php. Now we could edit it directly in the parent theme, but then we would never be able to update the parent theme; otherwise, we would lose our changes.
Instead, we want the changes stored in our child theme. Because the function is a pluggable function, we can add our changes into our functions.php file.
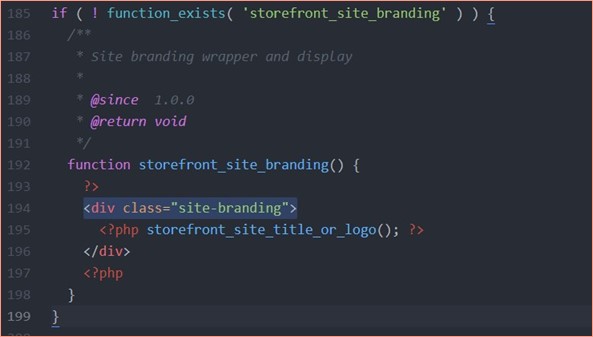
Copy everything between line 186 and line 198, leaving the ‘if’ statement behind. Go to your functions.php file in your child theme. In between the PHP tags, paste the code you copied from storefront-template-functions.php. Your file should look like this:
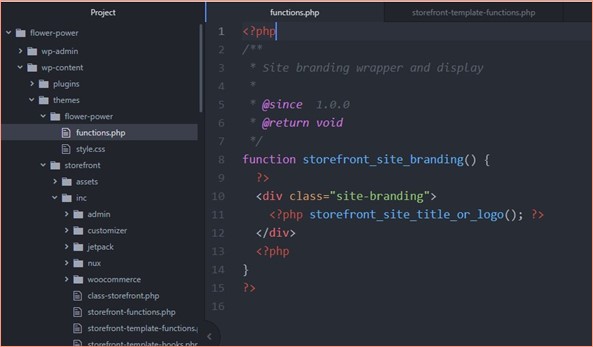
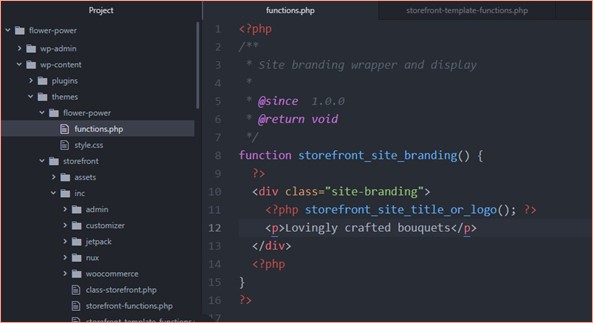
Now we can just write HTML into the div like this:
This is okay, but what if the client wants to change their tagline later, ideally, they should be able to go into Appearance > Customize > Site Info and update the tagline there. To do this, we can look in the ‘storefront-template-functions.php’ page and see how the description could be added. The answer is on line 218.

Copy this ‘if statement’ and paste it between the PHP tags on line 11 of your functions.php page. Add ‘echo $html’ to add the $html variable to the page. Your functions.php file should then look like this:
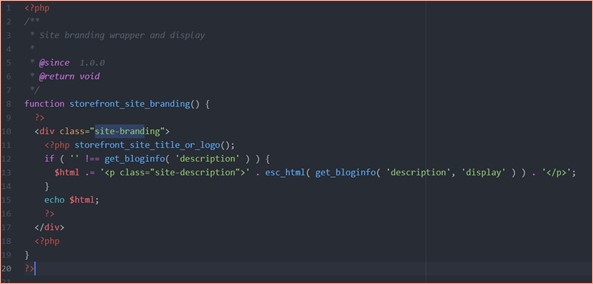
A simpler version, instead of creating the $html variable, is simply to echo the paragraph directly like this:
Editing template files
Another way to edit your website using a child theme is to edit the template files.
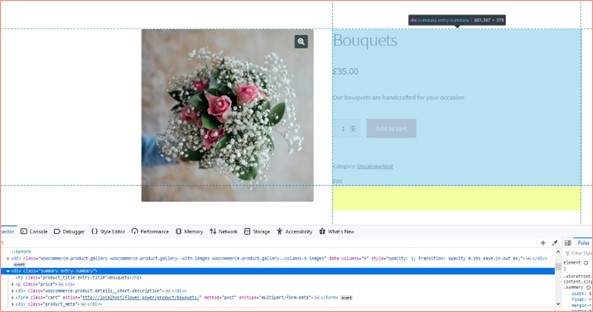
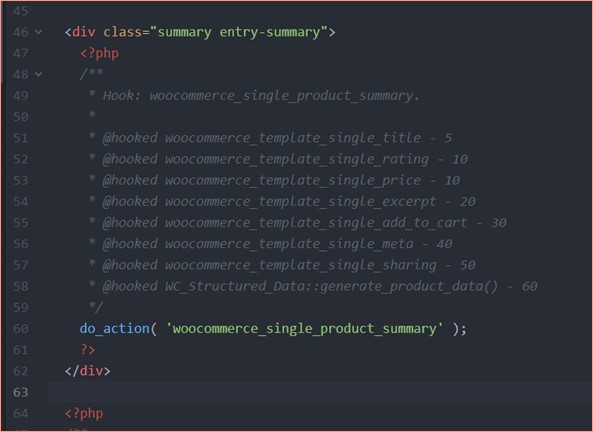
Let’s say we want to add a generic image below each product. First, we’d find out which template edits our product pages. In this case we’re looking for <div class="summary entry-summary">.
Search for that div in your WordPress files. You’ll find it’s in content-single-product.php in WooCommerce’s template files.
Here is where the product details are added to <div class="summary entry-summary">.
Because WooCommerce’s template files are already in your child theme, you don’t need to copy them across. If we were editing a parent theme’s templates, we would need to copy it across to our own child theme (and create the same folder structure for the file).
I don’t want to edit what gets output in the PHP; I just want to add an image after the div has closed. To do this, I simply added the image to the page (note, I’ve already added the image to my media folder).
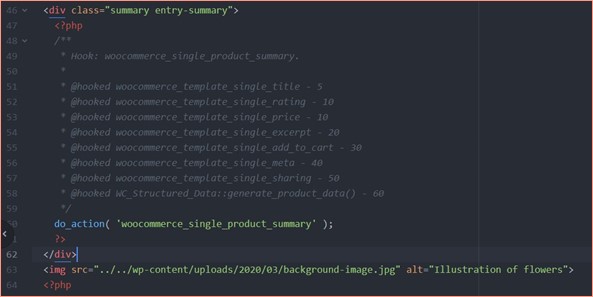
On all the product pages, I will now see an image added underneath the product info.
Activity
WATCH
For more on working with child themes, please watch the following video: WordPress: Building Child Themes 3. Child themes and CSS 4. Working with function files 5. Working with template files 6. Adding new functionality
Lesson Task
Brief
Choose a section of the website that you would like to update. Inspect the element to find out what it is and what its class is, then go to your code editor and search through your WordPress files for mention of this element.
If it’s a pluggable function, copy the function to your child theme’s functions.php page, and update the element there.
If you’re unsure, just do precisely what is shown in Lesson - ‘Working with child themes’. This should give you a feel for how it works. Then try it yourself with a different element.